Showing posts with label vita-mix. Show all posts

Monday, March 11, 2019

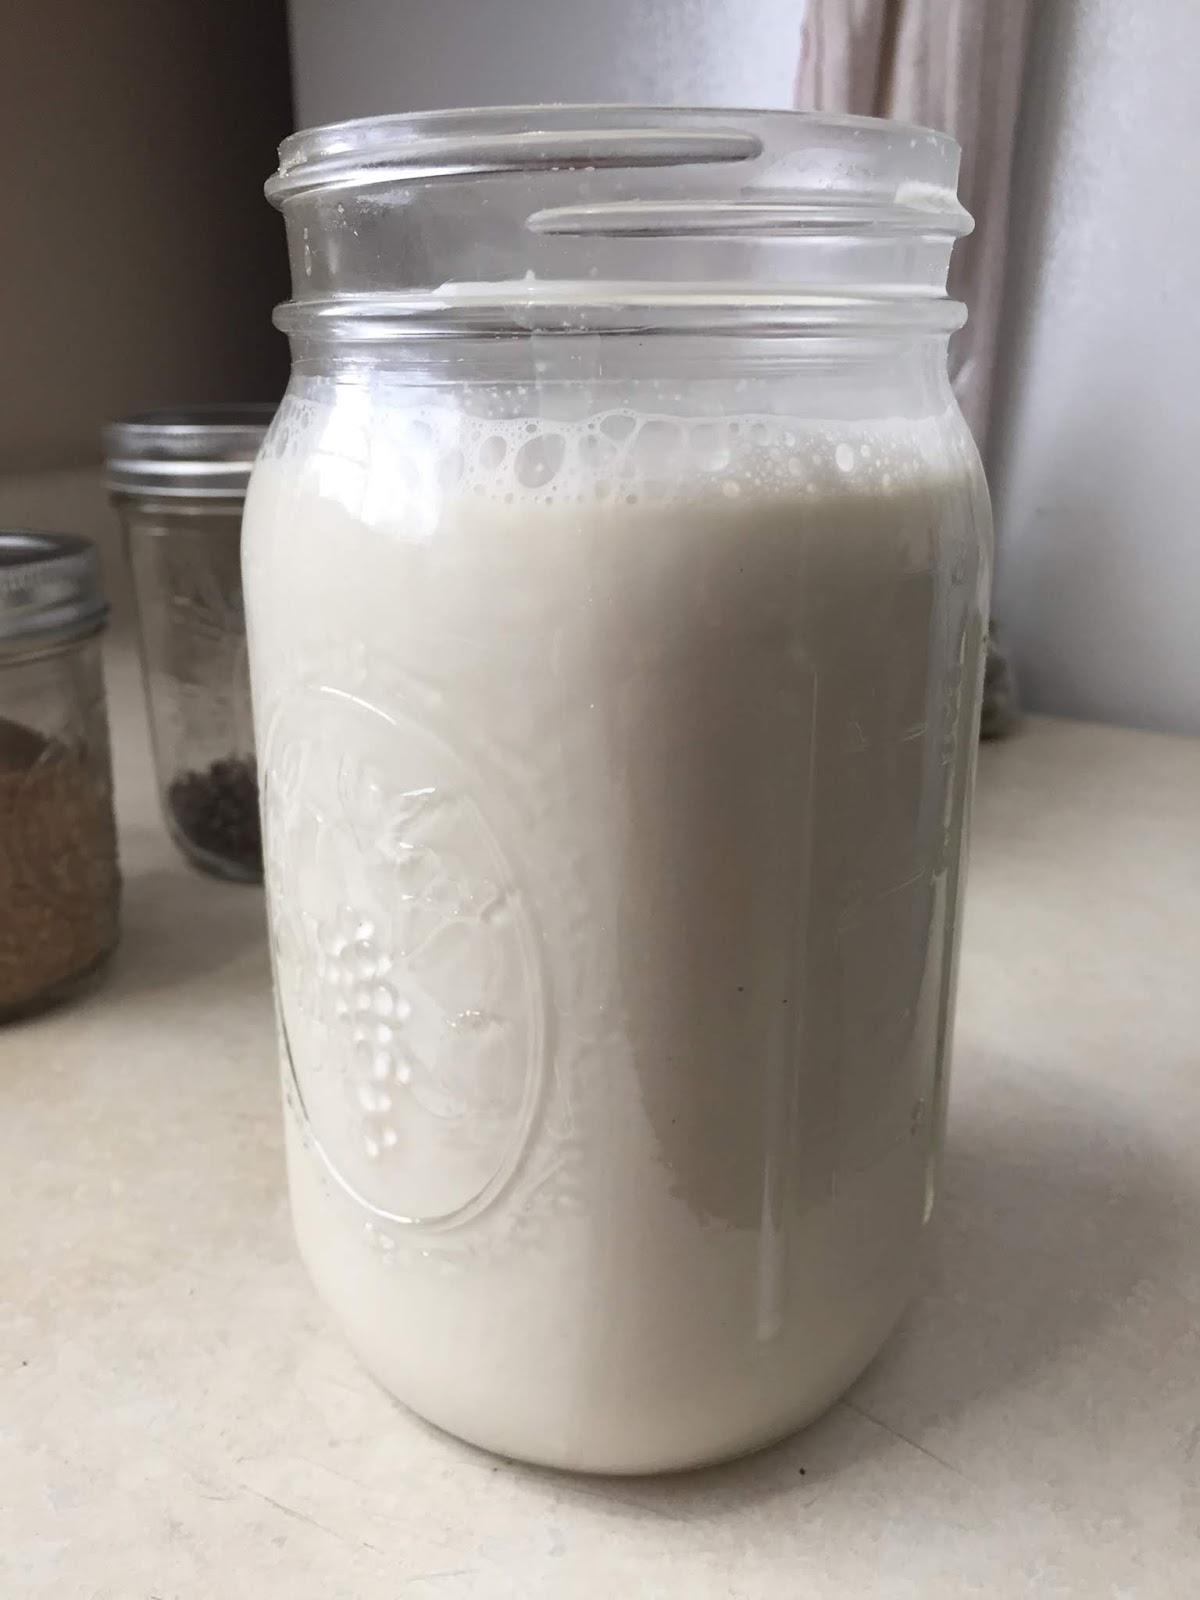
Tiger Nut Milk

We first tried tiger nuts when we lived in Ghana, West Africa. I would say the taste is reminiscent of a cashew, but much more fibrous and yet sweet, like a mild apple sweet. In Africa, we ate them much fresher and just like a nut, popped them into our mouth. I found them at a store from this company and picked them up. I was not disappointed. Since they were dried, I needed to rehydrate them with water. They are not actually nuts, but tubers that grow in the ground. Full of fiber and nutrition, they are also gluten free and safe for those who cannot have dairy.

Tiger Nut Milk


2 cups of dried tiger nuts soaked in a quart jar (or equivalent), filled to the 3 cup mark with water

Soak for about 3 days, draining the water, rinsing, and adding fresh water each day. I soaked mine in the refrigerator. Make sure your water is completely covering the tiger nuts plus about 1 inch, each time.

In a strong blender, blend the rinsed and drained soaked tiger nuts with water and fill up to about the 5 cup mark in blender. Run for about 3 minutes. Use a nut milk bag to filter the fiber-filled pulp from the liquid milk (Obviously, this will remove much of the fiber - If you want to use the fiber in baked goods, by all means go ahead). Use less water for thicker, creamier milk and more water to thin it, whatever you like. This ratio worked well for me as it was creamy, but not too rich.

Taste. You can use as is, or add whatever add-ins you like (sweetener, vanilla, etc.). I don't add anything preferring it's natural sweetness. Use up within about 2 days as it is best fresh and will turn quickly after that. Otherwise, you can try and freeze it in freezer safe containers, but the fresh consistency may not be the same.


Today I used it with my soaked rolled oats for a muesli type breakfast. Other things I added to my rolled oats: sliced fresh banana, sunflower and sesame seeds, chia, flax, bee pollen, goji berries and pumpkin seeds. So good!


Monday, March 27, 2017

Spicy Peanut-Free Sauce for Tofu, Pasta or Potatoes


This is a sauce recipe that I've used for quite a few meals. Mostly I've used it for a pasta and tofu dish similar to a much loved dish Pad Thai.

This makes a peanut-free version using almonds. But I have sometimes been short of the amount of almonds I need, so the recipe below shows the variation I used today. You can use mostly almonds and then make up the difference with other nuts or seeds. No big deal.

(By all means, if you use peanuts/peanut butter in your home, feel free to go ahead and use that instead. The recipe will still be delicious. Whatever nut or seed butter you use, please use unsalted varieties without other added ingredients. I like using whole nuts and seeds for a fresh, more raw sauce.)

If you have some tofu, bell pepper, some pasta, maybe some snow peas, you can make a great meal with this. The tofu can be cubed, then baked or broiled.

This recipe makes enough to dress a pound of pasta with veggies, etc on the side.

Spicy Peanut-Free Sauce

2/3 cup whole raw almonds OR 1/3 cup almond butter, unsalted (or other nut/seed butter)      
(I used a combination of almonds, walnuts, and pumpkin seeds)
2 Tablespoons brown rice syrup (or 1 1/2 Tablespoon maple syrup)
2 Tablespoons soy sauce (can be soy-free with coconut aminos instead)
2 Tablespoons rice vinegar (can use apple cider vinegar)
1 Tablespoon toasted sesame oil
1 Tablespoon tahini or sesame seeds
1 fresh garlic clove or 1/2 teaspoon dried granulated garlic
1 Tablespoon fresh minced ginger
1/2 teaspoon chili paste (or a mildly spicy curry paste) OR 1/4 teaspoon or less crushed red pepper
2 Tablespoons water, pasta water or vegetable broth

Throw this all into a good blender. Blend until smooth, only takes a couple of minutes. After you take this out of the blender, place the sauce into a bowl, then rinse the blender with about 1/4 cup of water and add it to the sauce. Don't forget this step! Otherwise it will be way too salty and extra thick. Mix together in bowl. Now it's ready to add to a pasta or potatoes or just about anything. You can even use it as a dip. This may taste a little salty on its own, but after you put it on pasta, etc, it should even out.
SaveSave

Monday, July 11, 2016

Summer Vegetable Bake - Ratatouille Style

Summer Vegetable Bake - Ratatouille Style


Place in a baking pan, the following puree, made with a blender:

1 onion, in quarters
3 carrots, coarsely chopped
3 celery stalks, in pieces
2 garlic cloves
3 cups of chopped tomatoes (canned ok)
salt/seasoned salt (as desired)
pinch of red pepper
black pepper (optional, as desired)
basil, fresh or dried (as desired)

Preheat the oven to 300 degrees Fahrenheit. After puree is made and placed in baking pan, layer on top the following in a decorative pattern:

 4-5 medium tomatoes, sliced
1-2 zucchini, sliced
1-2 yellow summer squash
1 eggplant, sliced (optional, not pictured)

Bake for 2 hours covered, then uncover and bake another 30 minutes. Adjust temperature and times as needed.

Saturday, October 27, 2012

Pumpkin Spice Smoothie

The shadows are coming sooner in the evening now. With the fall in full swing as the leaves turn beautiful colors ... and a little warmer weather right now, to be thankful for before it turns cold again, I am reminded of certain foods. Pumpkin is one of those.

I've always liked the memory I have of eating pumpkin spiced ice cream, in my pre-vegan days. It was at a pumpkin festival I went to in my college friend's hometown, back in the day. This comes pretty close to that memorized flavor. I'm still great friends with her and I still love the flavor of these spices combined with pumpkin. You can find the original recipe here.

Pumpkin Spice Smoothie


2 cups non-dairy milk (or use a handful of nuts/seeds w/water up to 2 cups)
1 Tablespoon chia seeds (helps thicken)
1 cup unsweetened pumpkin puree
2 Tablespoons maple syrup*
1 frozen ripe banana
2 teaspoon cinnamon**
1/2 teaspoon ground ginger**
1/4 tsp ground nutmeg** (I used 1/8 teaspoon freshly ground nutmeg)
pinch salt

Blend well in a good strong blender until creamy. It'll be done in less than a minute. Makes slightly more than 4 cups. Two batches of this recipe fit into my Vitamix container, enough for the whole family to enjoy.

* - You may substitute another sweetener if you like.
** - Or you can use about 3 teaspoons of pumpkin pie spice to replace the 3 spices listed above.

Thursday, October 25, 2012

Coconut Vanilla Mango Ice Cream

What do you do when your electric 6 quart ice cream maker doesn't sell in your yard sale? You make ice cream, of course! I was glad it didn't sell, but I hadn't used it for a while. So when I came across some bargain priced organic coconut milk, I knew what I had to do. An extended family gathering made a perfect reason to whip up some of the homemade variety and share. I told my children, only when Papa is home, can we bring it out of the freezer to enjoy some more.

I made a full batch (a full 6 quarts, my capacity for our ice cream maker). I'll share the amounts I used for the entire batch. Adjust as needed for your use. I based my recipe on one I found over at The Nourishing Gourmet (essentially, I made three recipe's worth with added mango).

Coconut Vanilla Mango Ice Cream


10 and 1/2  cups coconut milk
1 cup honey
6 Tablespoons homemade vanilla extract (recipe coming soon!)
2 pounds frozen mango chunks (about 6 cups)

In batches, I blended the ingredients together in my Vitamix and poured it all into the ice cream maker's metal canister and followed the directions for the ice and rock salt to process it into ice cream. It took an 1 hour for it to freeze. Then I put it all into containers and put into the freezer to harden.

We served it the next day. Good stuff. I used ice that wasn't crushed, so it came out the consistency of snow, but it was still delicious and creamy because of the coconut milk. Next time I will just pulse blend the mangoes into the mix to keep it in small pieces instead of pureeing it. I think it would have a bigger mango flavor that way. Also, when adding the vanilla, I'm going to stir it in instead so there are larger vanilla bean flecks.

I think my daughter likes it. =)


Saturday, December 17, 2011

Raw "Peanut" Sauce

I've been loving the recipes in Ani Phyo's book, "Ani's Raw Food Essentials". I think this book is a must for those of us who want to incorporate more raw foods into our diet. I'm not 100% raw, but you can't go wrong with more raw food in your diet. 

Here's a great savory recipe to try. And even if you put it on a base of something cooked, it's still got to be better than other dairy laden sauces out there. Definitely more interesting than tomato based sauces too. Add a little spice with this almond version of peanut sauce. I tweaked this recipe a little to include more almonds and less coconut oil than her original recipe. My version follows. 

Please feel free to change the amount of hot pepper to your liking. Remember the fat content of this recipe will definitely tone down most of the spiciness. So don't be afraid to put some in, taste and add more to get some zing. You might be surprised to find how much you can put in. I actually used a bit of dried cayenne pepper, since I didn't have any fresh jalapenos on hand. 

Raw "Peanut" Sauce

1/2 cup raw almond butter
1/4 cup coconut oil
2 Tablespoons (or less) Nama Shoyu (soy sauce)
1/4 cup fresh lemon juice
1 Tablespoon seeded, chopped jalapeno (or to taste)
1 teaspoon ground coriander
3/4 water

Blend everything together in a blender until smooth.

Use this sauce for anything you would use peanut sauce with. Be creative. This is a nice, but rich sauce, so think of low calorie veggies for topping with this sauce. Suggestions: shredded cabbage, kelp noodles, sliced cucumbers, zucchini shreds. Thinned down with a bit of water, you can even use it as a salad dressing.

When I made this, I actually doubled it, since I wanted leftovers for a couple of meals. My family loved it.

Thursday, November 17, 2011

Black Bean Chipotle Chili

A recent chili "cook-off" got me thinking about posting a chili recipe. I made some changes to one at Fatfree Vegan Kitchen. It has a rich, deep, dark color that looks and tastes wonderful. To make prep quick, use canned versions of the tomatoes, tomato sauce and beans.

This large recipe makes almost 4 quarts. Great for freezing ahead. As is, this recipe is mild enough while still giving a spicy heat. Instead of chili powder to give this soup its classic flavor, it relies on the real deal, a smoky chipotle pepper. If you want to cook in even more spicy heat, add another chipotle pepper to the recipe and enjoy.

Black Bean Chipotle Chili 

1 dried chipotle pepper, soaked with 3/4 cup water, pureed in blender
2 Tablespoons grapeseed oil/coconut oil
2 medium onions, chopped
8 cloves garlic, minced
1 green bell pepper, chopped
1 yellow (or red or orange) bell pepper, chopped
2 cups diced tomatoes
1 can diced tomatoes with chiles
2 cups tomato sauce
6 cups cooked black beans, drained and rinsed
1 cup fresh or frozen corn
2 teaspoons cumin
2 teaspoons oregano
1/2 teaspoon freshly ground black pepper
2 teaspoons paprika (or smoked paprika)
4 teaspoons carob powder, mixed with 1/2 cup hot water
2 teaspoons salt (or to taste)
1/4 cup raisins, soaked & pureed with 1 cup water
1/2 c. cornmeal, mixed with 1/4 cup water (optional thickener)

During the making of this chili, I was using my blender for a bit of the prep. You'll notice that the dried chipotle pepper and the raisins will need pureed (separately). Keep your blender (or personal blender handy for these two steps. A bowl and whisk will be helpful for the carob powder and optional cornmeal (also mixed separately). Because of these steps, I added water during cooking time (rinsing the blender and other containers, etc), so there is an option to add in a little cornmeal toward the end if you so desire. If you like a little more liquid in your chili, feel free to leave the cornmeal out.

Remove the stem (if still attached) from the dried pepper before soaking and proceed to soak and prep the pepper as stated, then set aside. Prepare the raisins as well at this time.

In a large pot, saute the onion in oil. When softened, add the garlic and bell pepper, then cook a few more minutes. Add the chili pepper puree, tomatoes, tomato sauce, beans, corn, and spices (except the carob, salt and raisins). Bring to a simmer.

In a small bowl, prepare the carob powder. Add it to the chili. Taste for seasonings and add salt to taste. Add raisin puree. You may add the optional cornmeal at this time, stirring the soup as you add it.  Cook for another 30 minutes or more at a low simmer, stirring occasionally.

Friday, August 26, 2011

Potlajella: Eggplant Dip

I tried a new recipe yesterday and it was a hit at our house. Even my five year old daughter gave it a "thumbs up". I found this in an old Vegetarian Times article, "A Father's Hands", by Lisa J. Solomon, September 2003 issue. I had an eggplant to use and figured I'd give it a go.

Archie's Potlajella (Eggplant Dip)

2 large, firm eggplants
1 small white or red onion, diced
2 cloves garlic, minced
1 small red tomato
1/2 teaspoon salt, or to taste
1/4 teaspoon black pepper, or to taste
pinch crushed red pepper
1 Tablespoon olive oil

Preheat oven to 400 degrees F. Wash eggplants and prick with a fork a few times. Put into a baking dish and bake for 30-40 minutes. Remove from oven and set aside to cool.

When cool, peel and discard skin. Place the eggplants in food processor or blender and pulse until  they are coarsely chopped. Add onion, garlic, tomato and seasonings (not oil) pulsing until mixed. Be careful not to overprocess - you do not want it smooth or liquid. (You can also do this by hand instead of using a food processor or a blender.) Place eggplant mixture in a serving bowl and drizzle with olive oil. Cover and refrigerate until serving time.


Saturday, July 30, 2011

Raw Zucchini Lemon Soup

This is a great recipe to share in the throes of summer zucchini season. I think most of you can understand what that means if you've ever had a garden or you have a close friend with one. Actually I can't help but pick up more zucchini every time I go to the farmer's market in town. Using real, local, fresh produce will yield wonderful results whenever you want great tasting food.

I really love zucchini and there are so many ways to prepare it. Here I present to you a raw recipe that is refreshing and very nice to serve chilled. Easy to whip up, literally, all you do is to puree the raw ingredients together and you are done. If you use chilled water and cold ingredients, you will not need to chill further.

I love using my Vitamix blender for this...it makes easy work of grinding up the spices and chunks of vegetables at the same time. I found this recipe on a "Chef Mary B" DVD that I borrowed from the local library. She calls it Zucchini Lemon Bisque.

Raw Zucchini Lemon Soup

Combine in a blender:

7 cups zucchini, peeled & chopped
1 cup cold water
1/2 cup lemon juice (or 2 lemons, juiced)
1/2 cup olive oil, extra virgin (or less)
2-3 cloves garlic (use only 1 for mild)
1 Tablespoon onion, dried, granulated (or 1 small onion)
1 Tablespoon agave nectar (or 1 teaspoon honey)
1 Tablespoon sea salt (or seasoned salt instead)
1/2 teaspoon cumin powder (or whole cumin seeds)
pinch black pepper (6 whole black peppercorns)

Puree all in the blender. Garnish with fresh dill, after serving into bowls.

Makes about 6 cups pureed soup.

Wednesday, March 30, 2011

More Green Smoothie Ideas & Tips

Since I wrote about making green smoothies in Africa, it's been almost 3 years now. I thought that it was time for an update on how I make them here in the states. I've also attended an event where Victoria Boutenko appeared and saw first hand how she makes her smoothies.

Greens:
Use a different type every day, preferably organic. Spring mix, spinach, romaine, collards, kale, parsley, etc. I use 5 to 6 ounces per batch, which makes about 2 quarts. I put the greens in first in the blender and yes, it will look like a lot. It will get smaller when you add some water and blend a little, then you can add fruit and other ingredients. I absolutely love parsley as the greens in smoothies and I didn't even think I liked parsley! Try mint for part of the greens.

Liquid:
Water is my standard, adding about 1-2 cups, depending on how juicy the fruit is. This depends on how thick or thin you want it. I also add a few tablespoons of fresh lemon juice, either freshly made or in small frozen cubes I make when I juice a bunch of lemons at once. Coconut water from a fresh young coconut is fantastic and considered the best way to replace electrolytes that nature can offer.

Fruit portion...

Bananas:
Save money when buying bananas when they are reduced. Take home, peel, then freeze (make sure they don't touch each other) on a baking sheet, if you have many of them. After I peel them, I cut them into thirds, so they freeze faster and are smaller for my blender to break down easier. You do not need to use bananas at all or you can use less. It gives the smoothie a creamy texture and sweetness, but these qualities can be obtained other ways.

Apples:
I add 1 or 2 apples to stretch my other more expensive fruit. I always use organic. I add seeds and all, cutting out only the stem and blossom end.

Other fruit:
Put in what fruit you like. It helps to have something sweet combined with berries to make up for their not-so-sweet taste. I don't usually add any citrus (other than lemon juice), but when I make an exception, I always peel with a knife only the outer colored part, leaving the white on (bioflavanoids). Pineapple cores can go right in with the pineapple if you have a good blender.

Sweeteners:
You may not need to add anything since you have fruit in the smoothie. But sometimes you may feel it's not sweet enough. If I don't have room to add much bulk, I might add a tiny bit of stevia (doesn't spike blood sugar), remembering a little goes a long way. If I have some room, dates might go in to sweeten, unless fresh fruit would do. When I can, I try to use fresh or frozen fruit instead of dried fruit because I want more water and less concentrated sweet.

Optional veggies:
Cucumber, celery, sweet bell pepper...in other words, mild, but juicy veggies can work here. I don't add too much of any of these since it may be hard to get the right sweetness I want. Also, don't add starchy veggies (carrots, peas, corn) as this will slow the digestive process down. Stick with those things that combine well with fruit and greens. Avocados work well and especially so if you don't use any bananas and still want it "creamy."

Other optional additions:
I realize some would not add in these other items, because it can slow the process of digestion down some. I feel that now and then it is a good idea to "supplement" this way. For children in the house not used to these things, it can be a way to get them into their bodies in agreeable ways (works for the greens!). I have added in (about 2 at one time) the following: 1 tablespoon chia seeds or 2 tablepspoons flax seeds (good for creamy texture), 3 tablespoons hemp hearts (great protein and good fats), 1 tablespoon whole leaf aloe vera juice (good digestive), 1-2 teaspoons fresh ginger (gives a great flavor, not hot this way and great to help digest), and/or carob powder as desired (gives it a chocolate-y flavor).

Remember that with smoothies you adjust amounts as desired. The point is to get the greens in and the more the better. Fruit helps to make it palatable. The liquid is to make it blend. Have some fruit frozen in small pieces to give it a cold temperature or you can add some ice in with the liquid.

It helps to have a powerful blender to blend some of these things. I love my Vitamix. It gets a workout everyday. Now if only my workouts were as often!
Friday, July 23, 2010

Pesto Sauce

Oh the joys of gifted garden produce! This time it was a large amount of basil! I knew it was time to look for a pesto recipe and this one had great promise. Tasting it was heavenly.

The only thing I needed to do was to substitute the pine nuts. They are more than $22 a pound here lately, so I've used cashews instead. I read that you can also use almonds and maybe even walnuts.

Pesto Sauce

1 1/2 cups fresh basil leaves
1/3 cup extra virgin olive oil
1 cup pine nuts (can use other nuts)
5 whole cloves garlic
1/3 cup nutritional yeast
3/4 teaspoon salt
1/4 teaspoon whole black peppercorns (or to taste)

In Vitamix: put all ingredients (except salt and pepper) in container and blend on low turning dial up to a "7" while using the tamper to get all the leaves into the blades. Stop when everything is still a little chunky, but blended well. Season to taste.

In food processor: process everything using the pulse setting, following all other instructions above.

Sun-dried tomato option: add 1/2 cup rehydrated sun-dried tomatoes to the ingredients.

Other herb/green options: Can use cilantro or parsley for part of the basil in this recipe. Can also use spinach or kale the same way. Great for stretching a small amount of basil for this recipe...still great flavor.

Wednesday, May 5, 2010

Almondaise - Raw Mayo!

This recipe is adapted from the book by Harvey and Marilyn Diamond, called "Fit For Life II: Living Health". It is a very good substitute for mayonnaise. Great for spreading on sandwiches and in salad dressings.

I posted earlier that we use Vegenaise sometimes, but it is neither soy free nor cheap. Here is a soy free version that is better on the pocketbook. Who doesn't like some mayo now and then?

Almondaise

1/2 cup raw almonds, soaked 4 hours or more, drained, rinsed & peeled
1/2 cup water
1 small sliver garlic (about 1/8 teaspoon)
1 teaspoon (or less) seasoned salt, Spike, or salt free seasoning
2-3 Tablespoons fresh lemon juice
dash of cayenne (optional)
fresh ground pepper to taste (optional)
2 cups (up to 3 cups) extra virgin olive oil or grapeseed oil (or a blend of both)

Put prepared almonds and water in blender and blend on high speed until a thick cream forms. You may need to add more water (one tablespoon at a time) to make sure the blades move freely. Then add garlic, seasoning, lemon juice and pepper and blend briefly.

While the blender in on high (or #10 on the lower "I" or "Variable" setting on the Vitamix), remove center plug in blender lid and slowly add the oil in a thin drizzle* (I usually only get the 2 cups to blend in, but if it works for you, go ahead with the third cup). Final consistency should be like a very thick mayonnaise. Store in a canning jar (quart size or two pint size) in the refrigerator. Keeps at least a week.

* Note: The original recipe tells how one may get more oil into the blender. "When mixture refuses to accept any more oil, the oil will begin to sit in a bubble on top of the almonaise. At this point, remove the lid and continue to add oil in a thin stream, beating shallowly with a spoon so that you do not hit the moving blade. This will force more oil into the mixture and guarantee a thicker product." I don't usually try to get more oil in. It is still nice and thick for our tastes.

Tuesday, May 4, 2010

Almost Raw Carob Chip Cookies

Here's another recipe from the "Everyday Raw" book by Matthew Kenney that I adapted. Again, in the original recipe, he uses raw cacao powder. I use carob powder instead.

Grind your own cashews and rolled oats for the flour called for in the recipe. I used my Vitamix to blend them to flour. Measure the flours after they are ground.

Almost Raw Carob Chip Cookies

2 1/2 cups cashew flour, fine ground
1 3/4 cups oat flour
1/2 cup carob powder
1/4 water
3/4 cup maple syrup
1 Tablespoon vanilla extract
1 1/2 teaspoons sea salt
1 cup carob chips
optional extra carob chips

Mix all ingredients together, except carob chips. Then stir in the 1 cup carob chips. Form into 3" cookies and press a few extra chips (if desired) into the tops of the cookies. Dehydrate on screens overnight at 118 degrees. Yields about 2 dozen, more if made smaller.

These taste great warm just out of the dehydrator. They are also great after getting cold in the fridge or freezer (where we put them so a certain little girl in our house doesn't help herself to too many!). =)

Monday, May 3, 2010

Homemade Carob Chips

This is a recipe adapted from the book "Everyday Raw" by Matthew Kenney. In the original recipe he uses raw cacao powder, made from raw cacao nibs (raw chocolate).

This was a fun recipe to make. It takes a little time to get the chips made, but the effect overall was worth it. We later used them to make double carob chip cookies. Yum!

Homemade Carob Chips

(Ready to go into the dehydrator)

1 3/4 cup cashews, soaked 1-2 hours
1 cup maple syrup
1 cup carob powder
1/4 teaspoon vanilla extract
1/2 teaspoon sea salt

Place all ingredients in Vitamix and blend until smooth. You may need to add some water a little at a time to get the blades to move freely. Place mixture into a piping bag (I used a zipper type quart bag, and then cut a corner off) and pipe out small chips onto a teflex sheet. Dehydrate overnight at 118 degrees. Keep in refrigerator in sealed container until ready to use. Makes about 2 cups or more.

(Dehydrated carob chips)

Wednesday, January 20, 2010

Caesar Salad with Pine Nut Cheese


I made this salad yesterday for myself and the children. We loved it. I sent my husband to work today with the fixings to make his own today. This is so delicious. Having all the ingredients on hand yesterday (with very little else around), I knew it was the perfect time to try something different. So get out your blender and get to work.

Caesar Salad

1-2 heads Romaine lettuce, prepared for salad
1 avocado, sliced
croutons from whole grain bread*

Pine Nut Cheese

Pulse in food processor until crumbly for salad topping:
1 cup pine nuts
3/4 teaspoon salt
1 Tablespoon flax oil (or Udo's oil)

Caesar Salad Dressing

Blend in blender until smooth:
1/2 cup olive oil
1/2 cup water
1 Tablespoon Tamari sauce (soy sauce)
2 garlic cloves
juice of 1/2 lemon, freshly squeezed
1 pitted date

I built our salads right on our plates. Romaine, avocado slices, pine nut cheese, croutons and then dressing drizzled over all. I ended up with extra cheese and dressing. Put any extra in tight containers in the fridge for later.

*I originally got this recipe from Bev Cook (Hallelujah Acres) at a seminar. The original recipe reads "live croutons, if available" - I didn't have this on hand, so I used a whole grain bread that I toasted and cut into small squares. If you do have some live bread available, this could be completely raw. Delicious either way.

On another note: When I made the pine nut cheese, I used my blender (I have no food processor). It came out a little more like crunchy looking nut butter. It was fine, I just had to put little clumps here and there on the salad instead. Still a great meal.

Thursday, January 14, 2010

Dehydrator Flax Bread

This recipe comes from the Hallelujah Acres magazine, Health News. I was pleased, when I made this the other day, how well it turned out. Flexible enough to be used as a wrap if not dried too crispy. And yet can still be dried a little more for a less flexible option.

No grain, no gluten, no yeast. The term "bread" meaning more about how you use it than what it contains. High in fiber, raw, and high in omega-3 fatty acids, it helps sweep out your colon for better health. Great as a new addition in our house. I can't wait to play with the recipe a little to have other flavor options. Spread with a little raw nut butter and roll it up. Mmmm.

Flax Bread

Mix together, making sure there are no lumps of raisins sticking together and set aside:
2 cups ground flax seeds
1 cup raisins

Put into blender separately:
2 cups water
2 apples, peeled, cored, and quartered
1/2 teaspoon cinnamon

Stir all ingredients together. Let stand for about 30 minutes. Spoon 1/3 of the mixture onto a teflex sheet for your dehydrator. Spread it out with a spatula (approx. 1/8" thick, without holes). Push any raisins on the edges more into the center. Repeat with the other portions of the mixture.

Dehydrate at 105 degrees F. for at least 2 hours. Then flip bread over onto the mesh sheet and peel away the teflex sheet from the bread. Leave bread in for another 2 hours depending on how dry you like your bread (make sure there are no more wet looking areas). The thicker the bread, the longer it will take to dehydrate. Don't let it get too crispy. If left more flexible, you can use it as a wrap.

My notes: I put the mixture on parchment paper, as I don't own the teflex sheets (yet) for my Excalibur food dehydrator. I didn't follow the 1/3 mixture idea in the recipe, but rather did more "individual bread slices" amount by eyeballing it (about 4x5" size roughly). This to me was helpful, because when I went to flip them over, some needed more drying time than others. Made this way, you can get about 12 "slices" from one batch.

Initially, I thought it would have a more cinnamon raisin bread flavor. It is not that strongly flavored. It did smell good when dehydrating though. Next time I might add more cinnamon. Pleasantly sweet without overpowering in that department.

I used the darker brown flax seeds, so it looked more like a dark bread. If you used the golden flax seeds, it would be lighter in color. Hard to tell it's made out of flax seeds once you eat it. A plus for people not into the "health" aspect of this bread. Taste? Great!

Monday, January 11, 2010

New Year's Nog

Every new vegan has a few recipes they would like to change so they can still enjoy the flavors they love. Just because someone is not eating dairy products or eggs does not mean that taste can't be replicated at least somewhat. We had this recently (hence the name) and even non-vegans enjoyed the great taste of this "nog" as well.

New Year's Nog

In a blender, mix well:
2 cups almond milk
2 bananas (medium ripe)
1/4 teaspoon vanilla

Pour into glasses to serve and sprinkle ground nutmeg on top. (Better tasting at room temperature.) Give a toast! =)

Friday, January 8, 2010

Almond Milk

I have been looking for a good non-dairy milk recipe. My friend pointed me to one that uses almonds. It is smooth and not as almond tasting as you would think. The soaking and straining set it apart from other recipes. You may never want any other milk again!

Almond Milk

Soak for 24 hours:
1 cup almonds

Drain, rinse and add:
6 1/4 cup water

Put into blender, blending well. You can leave as is for savory dishes that won't mind the extra pulp in them (extra fiber this way). You can stop here and use as is or add the following ingredients if desired. (Most of the time, I never strain or add anything else.)

Or you can strain through a nut milk bag. Tip: Turn the nut milk bag inside out first. It will make it easier to clean up when you are done. Put strained milk back into the blender if you decide to add the following ingredients.

Add:
10 dates (or as desired)
1 teaspoon vanilla
1/2 teaspoon salt

Blend well. Keeps for about 5 days.

Watch for the famous New Year's Day "nog" recipe forthcoming! Thanks, Kristen! =)

Friday, September 11, 2009

Sarah's Raw Salsa

The last of the reader's contest entries that I haven't posted before. Enjoy.

Sarah's Raw Salsa

4 tomatoes, chopped
1 jalapeno pepper
1/2 onion
a few cloves of garlic
1/2 cup (or so) fresh cilantro.

Chop in a food processor or blender. Add salt and lime juice to taste. Sometimes I process the tomatoes separately from the rest of the veggies and puree them a little more. Sometimes I put them in all together and leave it a little more chunky. I typically leave the seeds in the pepper and use whole tomatoes. If you seed the pepper you might want more than one to achieve the desired spice level.

Tuesday, February 10, 2009

Oat Burgers

A name like oat burgers sounds like nothing special. But when I make these at our house, they are anticipated with much joy. Many people think that eating vegetarian must mean eating a lot of meat and cheese analogs (foods made to taste, look and feel like meat or cheese). There's the burgers, crumbles, meatless "bacon", slices, shreds, and other stuff out there.

I found that although I did eat some of these things at first and many of the dairy analogs (especially after going vegan), after a while, these things didn't appeal to me anymore. There's just something about eating good, whole, and if I may say, pure food. And I realized that there are a lot of claims about these foods on either side of the fence about how healthy they are for you.

Generally the less processed food, the better. If you look at a veggie burger in the frozen food section and the ingredient list is a mile long, put it back. Then go pick up some of these ingredients and make yourself some oat burgers. Or go make some of your own veggie burgers using this Meatless Burgers - Universal Recipe.

Oatburgers
3 cups rolled oats
1 1/2 cups walnuts, chopped
1 1/2 cups chopped onion
1 1/2 cups water
2 Tablespoons olive oil
3 teaspoons (or more) sage
1 teaspoon salt or Homemade Seasoned Salt

Mix all ingredients well in a bowl* and let sit for 30 minutes to 1 hour (can refrigerate). This allows it to firm up to hold its shape better. I can get about 13 burgers out of this recipe if I use the canning lid shaping idea.

(*Vitamix help: put the water in the Vitamix container to the 1 1/2 cup mark, then add onion, cut into quarters, until you reach the 3 cup mark - this adds a little more onion, but we like it this way - then add your premeasured 1 1/2 cup (non-chopped) walnuts. Pulse at about 6-7 on low until chopped well but not pureed. Add to the rest of the ingredients, which are in another bowl, and proceed. This will still make your eyes a bit watery, but it's faster than doing it by hand.)

Once shaped, put on an oiled cookie sheet. Bake at 350 degrees for about 20 minutes and then turn over and bake another 10-15 minutes or until done.

Go ahead, put out the burger fixin's: ketchup, mustard, vegan mayo, romaine lettuce, sliced tomatoes, and maybe even some "5 S" Barbecue Sauce to top it off. Have a mouthful of fun! =)