Showing posts with label gluten-free. Show all posts

Thursday, January 18, 2024

Kristen's Memorable Lasagna

This was given to me by my good friend, Kristen. She recited from memory, her favorite recipe for lasagna as I wrote it down. I will never forget her kindness to me. This is in a bit different format than I usually write my posts, but I think you'll understand that she was also one of a kind. I will never forget her.

Sauce: Combine: onion, chopped & sautéed

        carrots, thinly sliced (mandolin is optional)

        prepared tomato sauce

        garlic &/ onion powder, optional


Pasta: Boil one package of lasagna noodles, preferably gluten free, made from brown rice, until al dente, not too soft! 


Creamy Cashew Cheese: Make one batch of creamy cashew cheese, by blending in a high powered blender until smooth the following

1 cup cashews, fermented if you choose

1/3 cup water

1/4 teaspoon garlic granules

1 teaspoon onion powder

1 teaspoon lemon juice

1 teaspoon salt

Blend in a high powered blender until smooth.


Assemble in layers, a little bit of sauce on bottom of a 9”x13” pan, then the following:

1. 3 noodles

2. Sauce

3. Fresh spinach

4. Dollops of creamy cashew cheese 

5. Optional - vegan cheese

6. Repeat steps 1-5

7. Again, repeat steps 1-5

8. Repeat step 1 with the last 3 lasagna noodles 

9. Add the last of the sauce and any cashew cheese left. 


You can add any seasonings in the dish or as a topping before baking that you like. Bake uncovered at 375 degrees Fahrenheit for about 20-30 minutes, until bubbly and cheese is melted. Let rest for a few minutes, before cutting, so it will stay together better. 

Sunday, September 10, 2023

Apple Crisp with Gluten-Free Option

 This recipe is an old favorite we make for celebrations when we have family gatherings. It's simple and easy to make. My daughter, who does not take to cooking as much as my son did, will bake this. It's like an easy version of apple pie and can easily be made gluten free. We try to always keep apples in the house anyway. It is from a recipe in the old More with Less cookbook, which incidentally has many things to read, not just recipes! My mother used to make this, and it is a favorite of mine. This cookbook taught me many things when I learned to cook and I still base many of my favorites on it, with the vegan and somewhat healthier versions of their ingredients. This is my version. Enjoy!


Apple Crisp


Combine in a bowl, then put apple mix into an oiled baking square/round dish: 

4-5 cups peeled (*preferred) and sliced/chopped/diced organic apples

1 Tablespoon flour (whole wheat, spelt, etc.) OR gluten-free blend**

1/4 cup dry sweetener (evaporated cane juice/turbinado/date/coconut sugar)

1 teaspoon Ceylon cinnamon 

1 teaspoon five spice powder/pumpkin pie spice/Ceylon cinnamon

1/8 teaspoon salt

1 Tablespoon water

--------------------------------

Combine oat topping separately in another bowl, into a crumb-like mixture: 

3/4 cup rolled oats (gluten-free if needed)

1/4 teaspoon salt

1/4 cup coconut oil

1/4 cup dry sweetener (evaporated cane juice/turbinado/date/coconut sugar)

1 1/2 teaspoons (or equivalent 1/2 Tablespoon) molasses 


Put the oat topping mix onto the apple mix in the baking dish. Bake at 375℉ for about 30-35 minutes or until baked through and bubbly. 

* Keep the peels if you have organic apples and freeze them to put into smoothies! 

** For other gluten-free options, try tapioca starch, arrowroot or even potato starch. Or it can be a gluten-free flour blend of your choice.

Tuesday, April 7, 2020

Tomato-Free Boston Baked Beans & an Impromptu Family Visit

(We are in the month of April in 2024. I am back dating this for 2020, because the first time I cooked this was on April 7, 2020.)

I had just gotten an Instant Pot secondhand. My son helped me find one. Yes, I am slow to the party. I wanted to make sure it was worth me buying another kitchen small appliance. I told myself I need to try cooking with it in the first week, or I might never use it. It could have been another item sitting on a shelf. This was going to be different. So try, I did.

I knew I wanted to cook up dried beans, without soaking, just because. Although I still recommend soaking beans, draining and then cooking with fresh water, which is better for digestion, I find I just put it off and use canned beans many times. 

Enter the Instant Pot. From the get go, I have been impressed. Never before had I ever learned to cook with a manual pressure cooker. The Instant Pot, an electric pressure cooker (slow cooker, etc), takes a lot of the guesswork out of it. I have no memory of my mother ever using a pressure cooker when I was growing up. 

I made sure to get some cookbooks from the library so I could learn from others. One particular book, written by Britt Brandon, called "The 'I Love My Instant Pot' Vegan Recipe Book" is chock full of such great recipes, that I suggest you go out and buy it! 

The recipe in her book is titled, "Boston-Style Baked Beans". The first time I tried it, I thought it would add a little flavor, more than the usual plain water cooked beans I make. Boy, was I pleasantly surprised to taste a familiar flavor from my childhood. 

My mother used to make beans along with cornbread. Her variation I had growing up used ham/salt pork, but no tomatoes. The canned, dark, overly-sweet baked beans in the store, are not what I remember at all growing up, other than a camping menu item. This recipe uses liquid smoke that I have found helpful to get those comfort flavors again after going meat free years ago.

The following is my take on Britt Brandon's recipe. I always get compliments on these. Keep in mind, I almost always double/big batch things like this. I use primarily an 8 quart Instant Pot as I find it the most versatile and useful for larger recipes. I happen to have the Ultra IP version. Read the notes below the recipe for my ingredient notes. Enjoy! 

Tomato-Free Boston Baked Beans - Big Batch 

(Want less than a big batch? You can cut this in half. But why? Cold leftovers make a great raw veggie dip!)


In your Instant Pot metal inner pot, combine the following 6 ingredients: 

2 pounds (about 4 1/2 cups) white beans (such as navy, cannellini, or great northern)

9 cups water 

1 whole bay leaf

1 Tablespoon refined coconut oil (optional) 

2 teaspoons salt 

2 teaspoons liquid smoke (Wright's brand preferred) (OR smoked paprika if you don't have liquid smoke)

Set to "pressure cook" for 40 minutes on high. Let release naturally, but if you need to, you can quick release after 10 minutes, once cook time has completed. 

---------------------------------------------------------------

When the IP pressure has come down and you can open it again, set the IP to "sauté" and "less" or low. Then add the following ingredients and simmer without the lid for another 10 minutes or more to get the consistency you like. We like ours a little soupy, nice and soft. Stir often.*

1 large onion, diced (about 1 cup)

2 Tablespoons prepared mustard (OR 2 teaspoons dry mustard)

2 Tablespoons evaporated cane juice/turbinado sugar (or maple syrup)

2 teaspoons molasses


*Another method is to simply add everything in all at once and pressure cook for the first 40 minutes amount. Then only to thicken it, would you add any sauté time, making sure to stir often. 


Notes about a few of the ingredients:

Oil: You do not need to add any oil, and for a while, I didn't. Now I find a little makes it feel more like I remember. You can use what you like for oil if you decide to include it. 

Salt: The is one time that I don't use my own Seasoned Salt. It would introduce too many other flavor notes, already taken care of by the other ingredients. I wanted to have it fairly predictable with the familiar flavor I was looking for. I used Himalayan salt, but whatever salt you like is fine.

Liquid Smoke: I prefer Wright's brand as I find the ingredients to be natural with nothing added for color, or salt. I just want the smoke flavor and in a glass bottle, the way I prefer. I used hickory liquid smoke, but Wright's also makes a mesquite and applewood flavor. The Wright's hickory and mesquite are non-gmo. They are all gluten free, without added salt or soy or vinegar. 

Onion: I like a good red onion, but any would suffice. The original recipe called for a specific measuring cup amount. I find that I will use a whole onion, no matter what. If I need less at a time, I will use a smaller onion. Do what works for you. Red, yellow, or white onion are good (green/spring onion not so much). 

Mustard: Use whatever you have on hand. The last time I made these, I happened to have a prepared stone ground dijon mustard. 

Sweetener: Use what you have. I would steer away from honey as it would change the flavor too much. I usually use a dry sweetener as listed. Maple syrup works, but adds another flavor too, not as much as honey would though. 

Molasses: And this is why these are called Boston Baked Beans. The history of this recipe will tell you more about why it needs to have molasses. Check it out sometime. I use a run-of-the-mill, locally sourced molasses from my local bulk food store bottled in a pint jar. You may ask about Blackstrap, but this is not the time to use it, in my opinion. 


A memory for this recipe (I am publishing this in 2024, so the rest of this memory will make sense... 

Monday, April 8, 2024. Many of you will know that this date (4/8/2024) was the solar eclipse and many in our area had watch parties because we were in the area of totality across our state. The night before, my aunt and uncle from out of state, called to ask if my dad was willing to host them for one night so they could enjoy the eclipse from his property. The duration of the eclipse would start about 2 pm and end about 4:30pm, with the totality (darkness) from about 3:14-3:17 pm. They drove early in the morning to get here. They arrived about five minutes after 2 that Monday afternoon, because of the eclipse traffic (in this area, most schools called off for the day). We enjoyed the afternoon and evening chats with them as my dad is also our next door neighbor. We were glad to have a great day weather wise, to take it in together with them. We snapped photos of the eclipse and family selfie photos to remember our day by. 

I realized that although we had just gotten back from a trip that Sunday, we would need to make a supper plan. I really hadn't gotten much in the way of groceries just yet, but my son was here to help. He's a cook in his own right and he offered to help. He saw we had volunteer collard greens growing in my (not yet cleaned up) garden the previous year. He also suggested we pick a few dandelions for the meal. I was up for it. We pulled out the grill on our Breeo fire pit (we love this thing!). I had a Victoria cast iron wok that he pulled out and prepared. He cooked the collards with some onions, and seasoned them nicely. Then the (cleaned and washed) dandelions went in, simply made and gave a taste for everyone to try. We supplemented with some kale and spinach mix sautéed up. Red skinned potatoes were oiled, salted (Herbamare herbed salt) and wrapped in foil (one of the rare times I use foil) to be baked on the grill next to the cast iron wok. We brought out some extra seasonings if anyone wanted any. 

We had a feast! Earlier in the day, I put on this recipe of beans in the house, knowing we needed some for the coming week anyway - next time I would try cooking them over the fire! Let me tell you it was the best way to eat these beans and the day was perfect. We sat, talked and ate until sunset around 8 pm or later. 

An impromptu visit for my dad, his sister and brother-in-law, my aunt and uncle (a couple I always love to talk to and visit) .... turned out to be a great day. My daughter was home, my son pulled in right before they arrived and my husband came after his work day just in time to get our fire started and join us to make our supper outside. What a wonderful fireside meal to end the day of the solar eclipse... and lovely memories to remember. We even had two sunsets, both of which we spent outside in the nice 70℉ day. 

Monday, March 11, 2019

Tiger Nut Milk

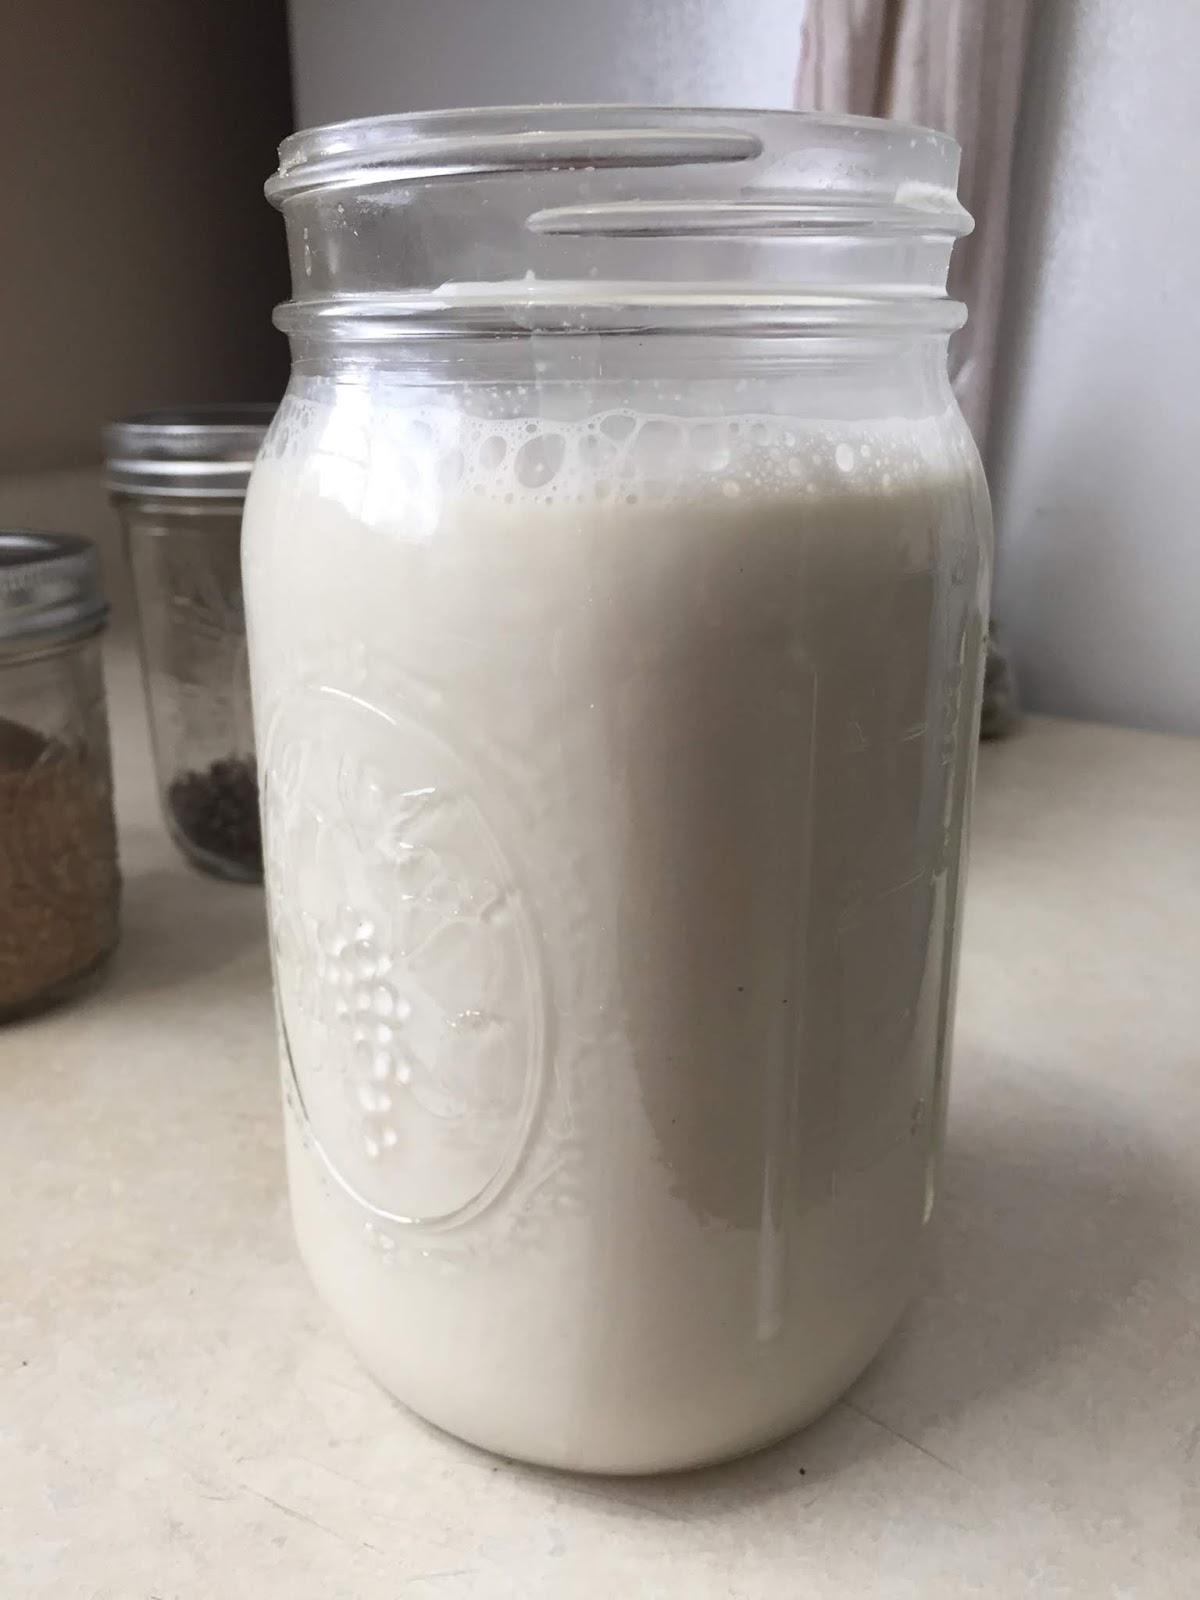
We first tried tiger nuts when we lived in Ghana, West Africa. I would say the taste is reminiscent of a cashew, but much more fibrous and yet sweet, like a mild apple sweet. In Africa, we ate them much fresher and just like a nut, popped them into our mouth. I found them at a store from this company and picked them up. I was not disappointed. Since they were dried, I needed to rehydrate them with water. They are not actually nuts, but tubers that grow in the ground. Full of fiber and nutrition, they are also gluten free and safe for those who cannot have dairy.

Tiger Nut Milk


2 cups of dried tiger nuts soaked in a quart jar (or equivalent), filled to the 3 cup mark with water

Soak for about 3 days, draining the water, rinsing, and adding fresh water each day. I soaked mine in the refrigerator. Make sure your water is completely covering the tiger nuts plus about 1 inch, each time.

In a strong blender, blend the rinsed and drained soaked tiger nuts with water and fill up to about the 5 cup mark in blender. Run for about 3 minutes. Use a nut milk bag to filter the fiber-filled pulp from the liquid milk (Obviously, this will remove much of the fiber - If you want to use the fiber in baked goods, by all means go ahead). Use less water for thicker, creamier milk and more water to thin it, whatever you like. This ratio worked well for me as it was creamy, but not too rich.

Taste. You can use as is, or add whatever add-ins you like (sweetener, vanilla, etc.). I don't add anything preferring it's natural sweetness. Use up within about 2 days as it is best fresh and will turn quickly after that. Otherwise, you can try and freeze it in freezer safe containers, but the fresh consistency may not be the same.


Today I used it with my soaked rolled oats for a muesli type breakfast. Other things I added to my rolled oats: sliced fresh banana, sunflower and sesame seeds, chia, flax, bee pollen, goji berries and pumpkin seeds. So good!


Saturday, March 31, 2018

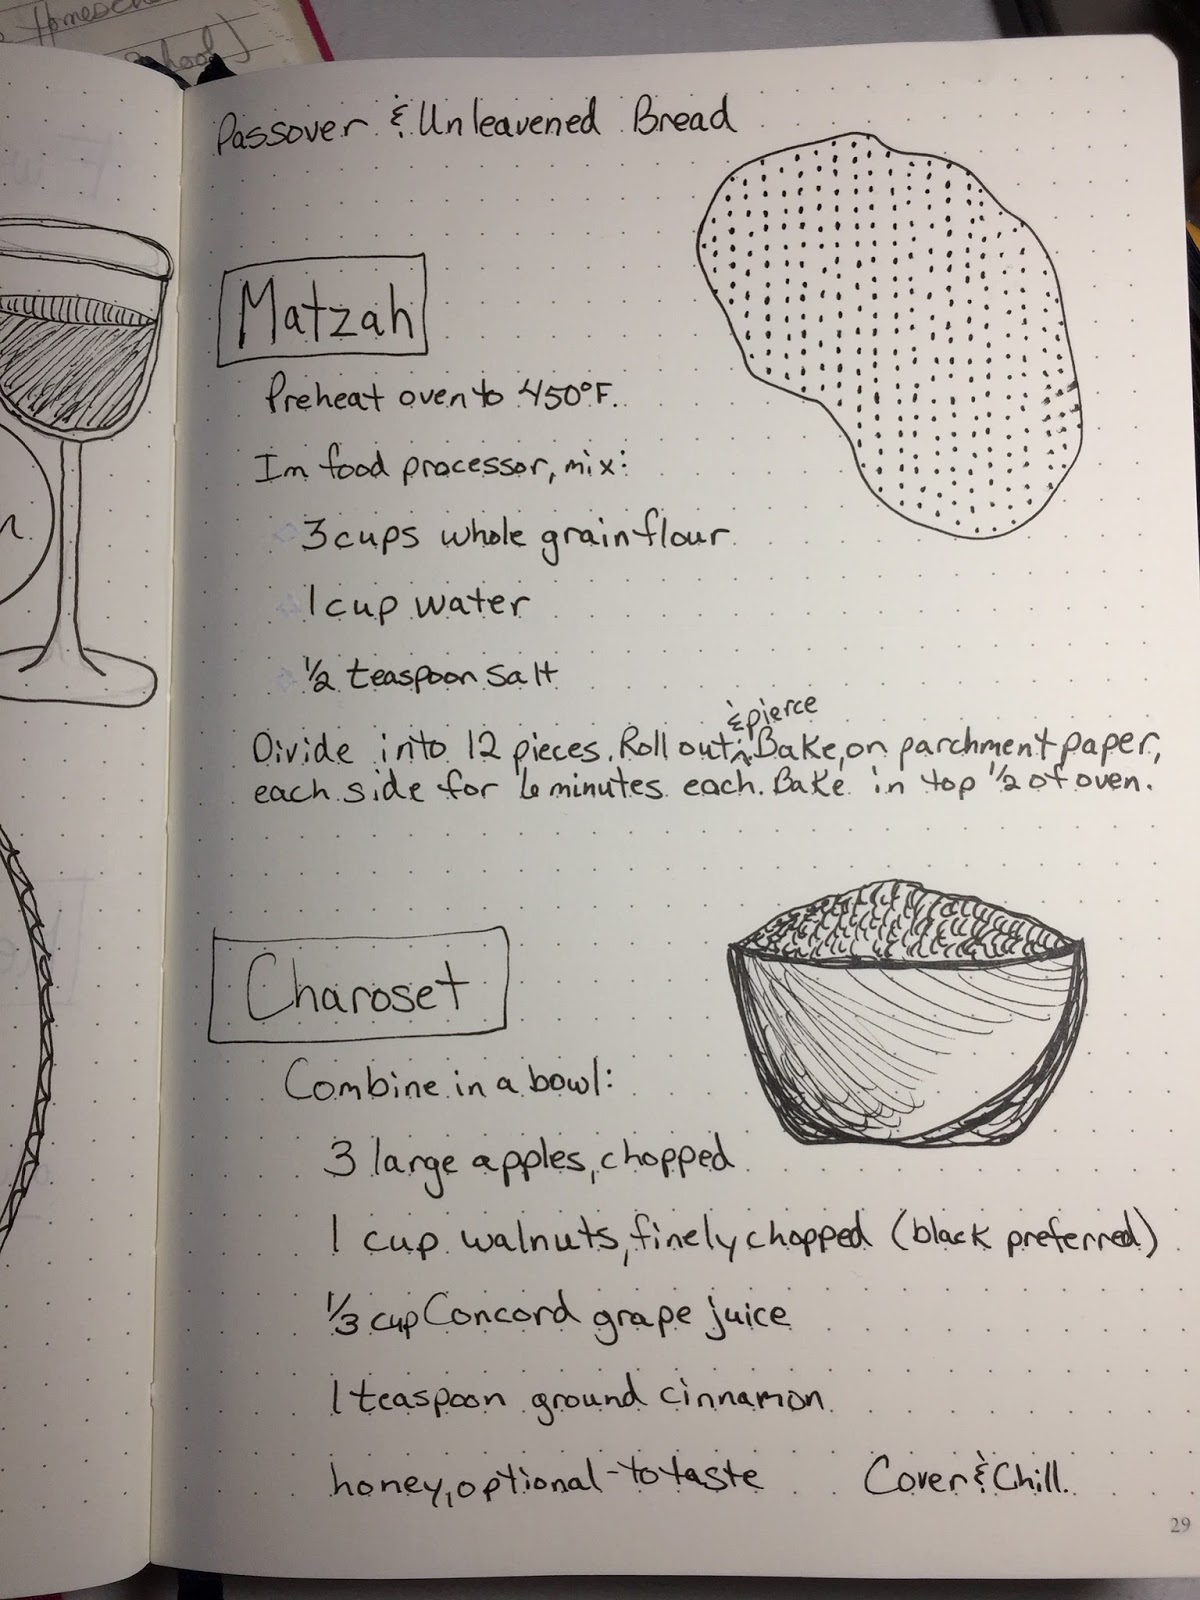
Preparing the Seder and Apple Walnut Charoset


This is a mixture on the Passover Seder plate symbolizing the mortar used by Hebrew slaves in Egypt. You may use a mixture of different kinds of apples. I used only Gala apples this year and it was delicious. This is Ashkenazic style charoset (or haroset, depending on how you spell it). 


Apple Walnut Charoset


Combine in a bowl:

3 large apples, cored and chopped
1 cup walnuts, finely chopped (black preferred, but English will work)
1/3 cup Concord grape juice
1 teaspoon ground cinnamon
honey or maple syrup, optional - to taste

Cover and chill. This recipe may be prepared using a food processor on the pulse setting to desired consistency. I like mine a little more on the finely chopped side.

Thursday, November 23, 2017

Main Dish Sauté - Thanksgiving 2017

This is what we enjoyed today as a main dish for our Thanksgiving meal. Everyone really liked it. I'm sorry to say I don't have exact measurements to give you, but I will try my best to tell you what went into the dish. This is one of those check-the-pantry-and-see-what-you-end-up-with dishes. Turned out wonderfully!

Thanksgiving Main Dish Sauté


Mix the following together in a bowl: 

about 2 cups cooked Kidney Beans, rinsed & drained, mashed some (or another dark bean)
1 can young Jackfruit in salty brine, drained & mashed
about 10 dried Shiitake Mushrooms, rehydrated in hot water, drained & chopped                  
    (save broth from soaking mushrooms for this recipe later)
about 10 halves Sun-Dried Tomatoes, rehydrated in hot water, drained & chopped
about 1/4 cup Gari (fermented cassava root, dried & granulated), or 1/4 cup rolled oats
about 1 Tablespoon Tamari/Soy Sauce 
1 teaspoon Porcini Mushroom powder (can be optional)
about 2 Tablespoons Dried Minced Onion

2 Tablespoons coconut oil (or similar)
2 cloves garlic, minced
(about 1/2 teaspoon sage would be lovely here, but I was out! )

Add in as much broth from the shiitake mushrooms as you need to make it somewhat dry, but still moist, as if you could make burgers/patties from it. If it's too dry, use a vegetable broth or water (be careful not to make this dish too salty). If it's too wet, opt to use more oats (or even breadcrumbs if not gluten free, or another starchy food that soaks up liquid). 

To a large skillet, add coconut oil, on medium heat. Add in garlic, minced. Sauté for a couple of minutes, then add the bean mixture to the pan and heat through, turning frequently, about 10 minutes until hot. 

Since we ate this a few hours later, I let the mixture cool and then put it into a loaf pan and refrigerated it until we went to my parent's home. I then reheated it in their oven while other things were baking. I didn't try to get it out in one loaf. Instead we spooned it onto our plates from the baking pan. 

Our menu for today's meal:

Vegan Main Dish Sauté (recipe above)
Homegrown creamed corn, baked
Shelled edamame 
Roasted garlic (one whole bulb per person!)
Roasted Roots (potatoes, onions, carrots), my chef son's specialty dish
Pumpkin spice cake with black walnuts


Friday, March 30, 2012

Lasagna Bake

I've been trying some gluten free products lately. Some good, some ok and some I should stay away from if I'm going to continue my emphasis on whole foods and avoid overly processed foods.

Recently I tried some wide noodles made from potato. This was my first try at cooking these and I decided to try them using a recipe on the back. I've also been using some tofu again now and then. Seeing as how I needed to make it vegan (it called for cheese and eggs), I made some changes.

I'm pleased with how it turned out. It's made like the no-boil recipes for lasagna. You might be able to substitute other gluten-free noodles for this recipe, although you'll have to experiment and find what works for you. Please read the recipe thoroughly before gathering all your ingredients.

"Tastes Like Lasagna" Bake

1 recipe "stedda ricotta"
1 Tablespoon ground flax seed mixed with 3 Tablespoons water
1-10 oz. package frozen chopped spinach, thawed and drained
1/2 teaspoon oregano
1/2 teaspoon seasoned salt
1/8 teaspoon pepper (or to taste)
2 Tablespoons nutritional yeast
3 cups tomato sauce (like spaghetti sauce)
1-9 oz. package gluten-free wide potato noodles
1/2 cup water

In a bowl mix together the "stedda ricotta", ground flax seed (already mixed with water), spinach, oregano, salt and pepper. Preheat your oven to 350 degrees F.

At this point have all of your ingredients ready. You should have the spinach/"ricotta" mix (divided in half), nutritional yeast, tomato sauce (divided in half), dry noodles (also divided in half), and 1/2 cup water ready. I used a 9"x 13" pan, you can use a smaller pan for a taller finished product if you like. Oil your pan now (I used coconut oil and a little olive oil together).

Layer in this fashion, spreading evenly after each addition:
1/2 spinach/"ricotta" mix
1/2 dry noodles
1/2 tomato sauce
2 Tablespoons nutritional yeast
1/2 spinach/"ricotta" mix
1/2 dry noodles
1/2 tomato sauce
Pour the 1/2 cup water around the edges.

The recipe says to cover tightly with foil. Since I don't use foil, I covered it with a cookie sheet instead. Bake for one hour or until bubbly. Let stand for a few minutes before cutting.

Enjoy. Pass the crushed red pepper, please! =)

Tuesday, December 7, 2010

Simple & Quick Pizza Crust

I use this recipe every time I need something quick for pizza preparation. It reminds me of a biscuit crust. This recipe makes enough for a good thick crust for a cookie sheet size pizza. If you want thin and crispy use this recipe for two sheets or make half the recipe.

We had this last night topped with marinara sauce, spinach, broccoli, garlic, onions, and sliced tomatoes, and a sprinkle of oregano. My children loved it. (See added edited note about photos.)

Simple & Quick Pizza Crust


4 cups whole wheat (or other whole grain) flour, also works with gluten-free flour!
4 teaspoons baking powder
2 teaspoons salt
1/2 cup olive oil
1 1/3 cup water

Mix all ingredients together in a bowl. Prepare your pizza pan by oiling it. I use coconut oil. You can use cornmeal to flour it if you like as well. Spread, roll out or pat into pan. When rolling, use a glass tumbler to roll right in the pan. Prick with fork. Bake at 350 degrees for about 10 minutes, without toppings (or only 5 minutes for a thin crust).

Remove from oven after pre-baking. Then add toppings as desired and bake for an additional 10 minutes or until done. Be sure to watch the thin crust to make sure it doesn't burn on the bottom.

Edited to add: the option of a gluten free crust will work with this recipe. I have now made this successfully at least three times this way. And it is still like a biscuit crust. The photo above shows the gluten-free crust dough waiting to be put on my sheet to prebake. Here it is starting the prebake.


 And then of course, afterward...

So good!
Toppings in the photos: my daughter's pizza sauce, garlic, onions, 3 colors of local bell peppers, a kale and spinach chopped mix, and my favorite - Kalamata olives!

Monday, November 23, 2009

Stuffing Anyone?

I was making vegetarian stuffing for our Thanksgiving banquet at church yesterday and thought it would be a timely post for this week.

I found the recipe by Anne on vegweb.com. I made slight changes, so I am posting my version. The original recipe had a few optional ingredients and slight differences from my version. This tastes similar to that "stove" stuff. It's really good and everyone will enjoy it, vegetarian or not.

Vegetarian Stuffing with Gluten-Free Option

Preheat oven to 350 degrees F.

Put into a 9 x 13 baking pan in the oven to toast, about 15 minutes, watching closely (can even use a dry skillet on stovetop if needed, toasting the bread cubes in batches):
8 cups cubed bread (gluten-free bread can be used instead... great either way!)

Put in a large skillet:
2 Tablespoons coconut oil (or other high heat oil)

When heated, add and saute the following three (or four), over medium heat until onion is translucent:
1 medium onion, diced
3 stalks celery, sliced
2 large carrots, peeled and thinly sliced
chopped or sliced mushrooms, amount as desired (optional, but makes it a more of a main dish)

Separately mix the following together:
1/4 teaspoon rosemary
1/4 teaspoon thyme
1/4 teaspoon sage
1/4 cup chopped fresh parsley
1/4 cup chopped walnuts
1/4 cup chopped pecans
1/2 teaspoon salt (or seasoned salt)

Add the seasoning and nuts to the toasted bread.
Carefully drizzle with:
2 cups vegetable stock (gluten-free, if needed)

Mix gently. Bake, uncovered for 20-30 minutes.